How To Use Keyframes In Capcut PC And Mobile And Mobile
Keyframing is a widely used technique in video editing to create animations and transition effects. It specifies the starting and ending points of particular transitions. You can set it at the specific point of time where you want the action to start. If you are going to create animation, a keyframe is an essential part of your project. Keyframes can be added to the videos, stickers, text, etc. Capcut, one of the best and ultimate video editors, owns this feature and allows you to add keyframes to your projects to take them to the next level.
In this article, we will discuss multiple ways to add a keyframe in Capcut and how to use a keyframe in Capcut PC as well.
How To Add Keyframes In Capcut
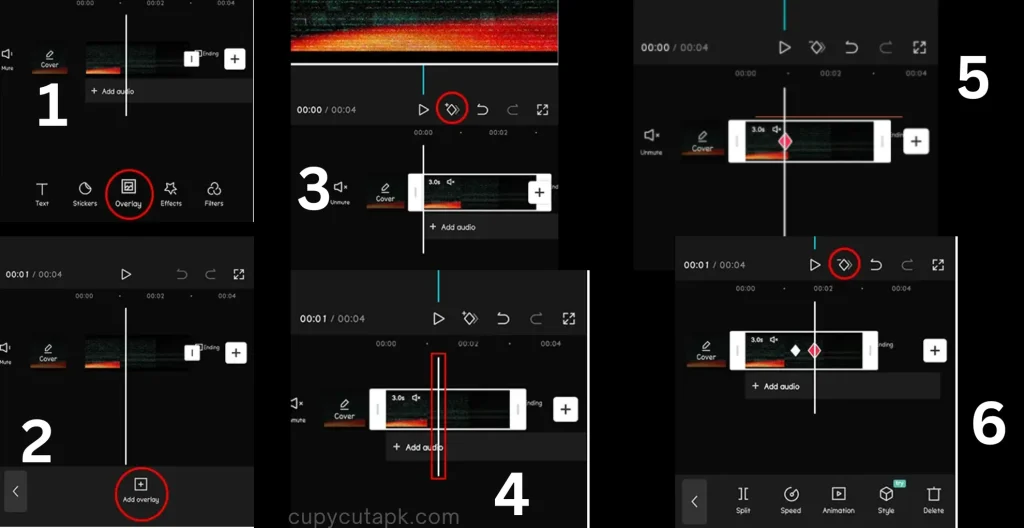
- Open the Capcut app, start a new project, and import a video to add to your project.
- Select the video on the timeline and click on “Overlay”.
- Click on the “+” icon to add objects like stickers, text, shapes, images, etc as an overlay.
- Click on your added object and you will see multiple options. Tap on the small diamond-shaped keyframe icon.
- Select the point where you want to start the animation and tap on “Add” to add the keyframe starting point.
- Move the video ahead on the timeline to decide where you want to end the animation and add another keyframe here again.
- You can make any necessary adjustments like position, scale, rotation, etc for perfect animation results.
- Preview your project and export.
How To Use Keyframe In Capcut PC
Start a Project
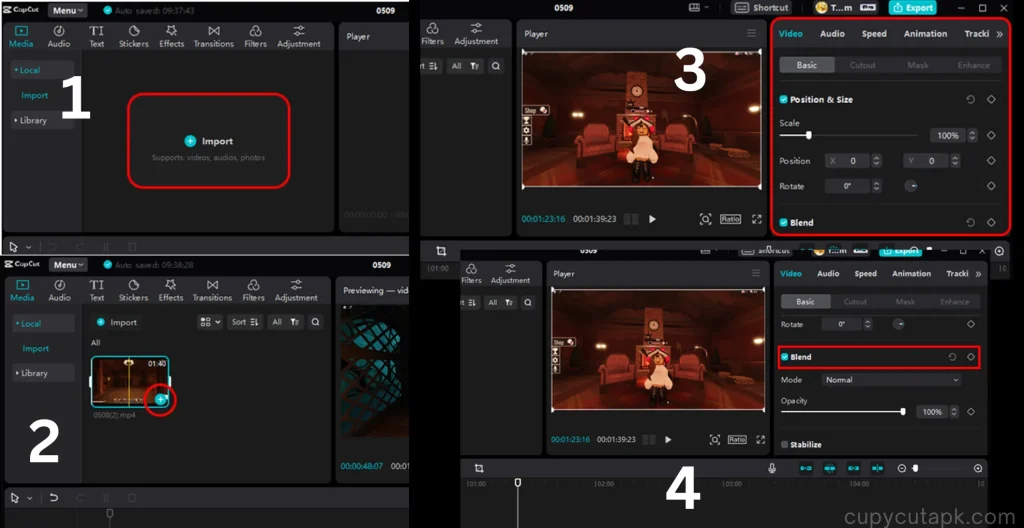
- Open the app on your PC, start a new project, and click on the “Import” button. You can add videos from the Capcut library as well.
- Click on the “+” icon in the bottom right corner and add your video to the timeline. You can also use the drag-and-drop option as well.
- After clicking the video on the timeline, you will see the tools menu on the right side. Go to the basic tab and tap on “Blend” from the given options.
Add Keyframe To The Video
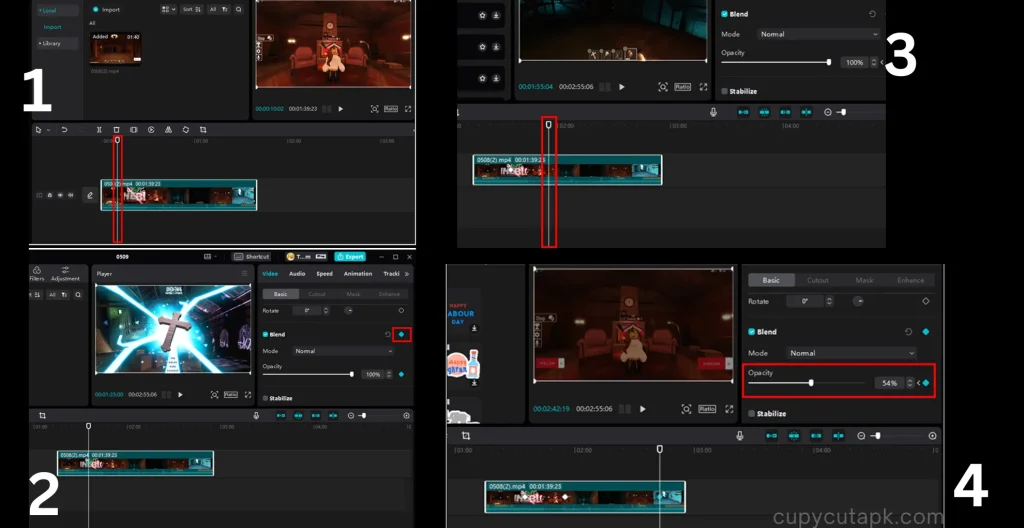
- After clicking on the blend button, adjust the position and opacity and decide the animation starting point.
- Click on the diamond-shaped keyframe icon to add the first keyframe. You will see a white diamond shape on the timeline.
- Position the playhead at the animation ending point, adjust opacity, and click on the keyframe button again to add.
Save The Project
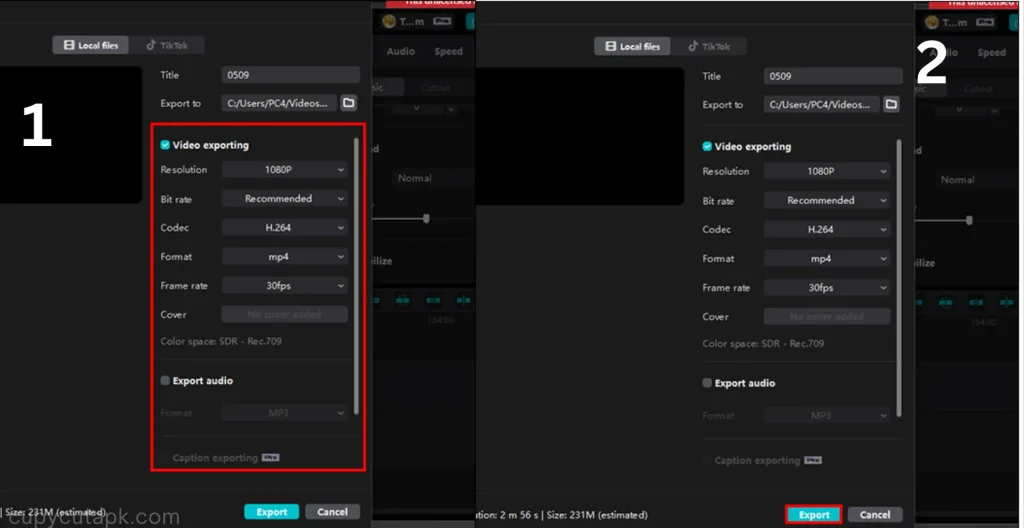
- Click on the “Export button”, and a pop-up will appear. Here you can adjust settings like resolution, format, bit rate, etc, before saving your project.
- When all the settings are done according to your requirements then click on export again to save the project in your device.
How To Remove Keyframes In Capcut App
The process of removing the keyframe is the same as adding the keyframe. Place the playhead right on the particular diamond and click on the keyframe button on the right-side menu. You can remove all the keyframes in one click by tapping the circular arrow there.
Final Thoughts
Keyframes are powerful tools to add special and dynamic effects and transitions to your video. With Capcut, you have endless possibilities for creativity. The process is not complicated, once you get a hang of it.
Feel free to share your experience with Capcut in the comments below. For more tutorials related to Capcut, such as ‘How To Do Zoom In Effect On Capcut,’ visit our blog.
